Online HelpBack to overview
Creating a new project(*)
The introduction of the data for a new project takes few moments and can be divided into these simple steps:
-
(Optional) Assigning the language of the interface and units of measurement
Click on the button "Settings" and select the desired language and units of measurement.
-
Introduction of "Project Information"
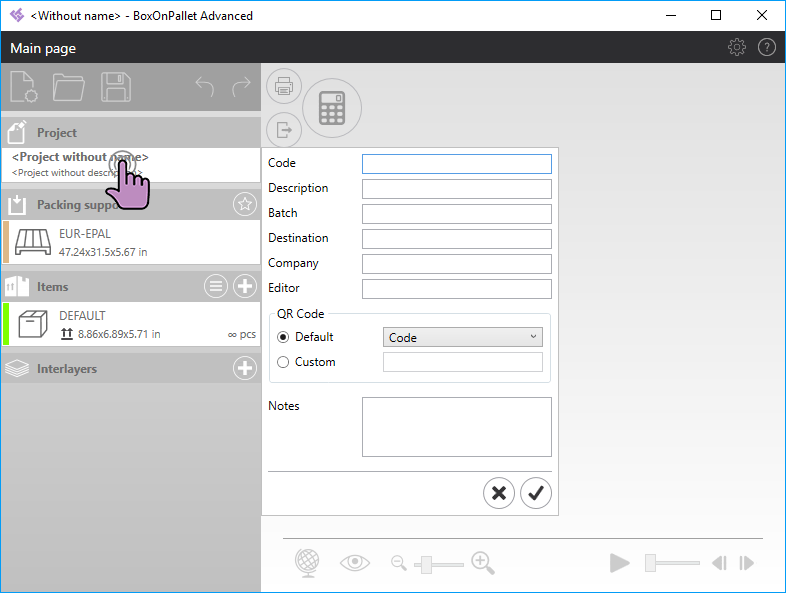
Field Meaning Code The project identification code. Will be included in the Load Plan report. Description Description of the project. Will be included in the Load Plan report. Batch Possible pallet/container lot number. Will be included in the Load Plan report. Destination The destination of the shipment to indicate in the report. Editor Editor of the project. Company The company to which the editor belongs. QR Code Allows you to define the information to be included in the QR code displayed in the report. You can select one of the default options or introduce custom text. Notes Any project notes.
-
Definition of the packing support
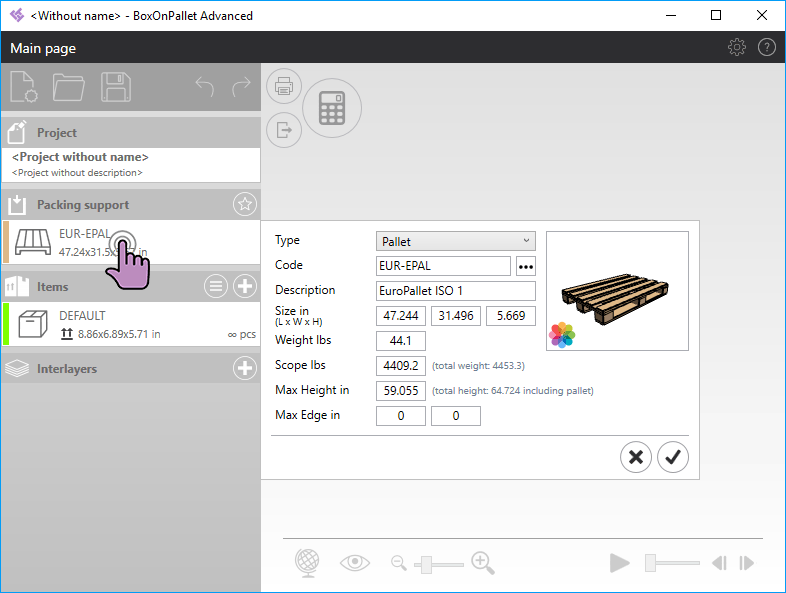
Tips
- Click the button
 to open the list of predefined items for the selected load unit type.
 - Click on the icon
 to select the color with which to represent the object.
 - When using pallets, you can indicate the maximum height that can reach the palletized objects and the maximum allowed extension beyond the perimeter of the pallet.
- Click on the icon
 to identify the packing support as "default" and ensure that it's used automatically in subsequent projects.
- Click the button
-
Defining the items to load
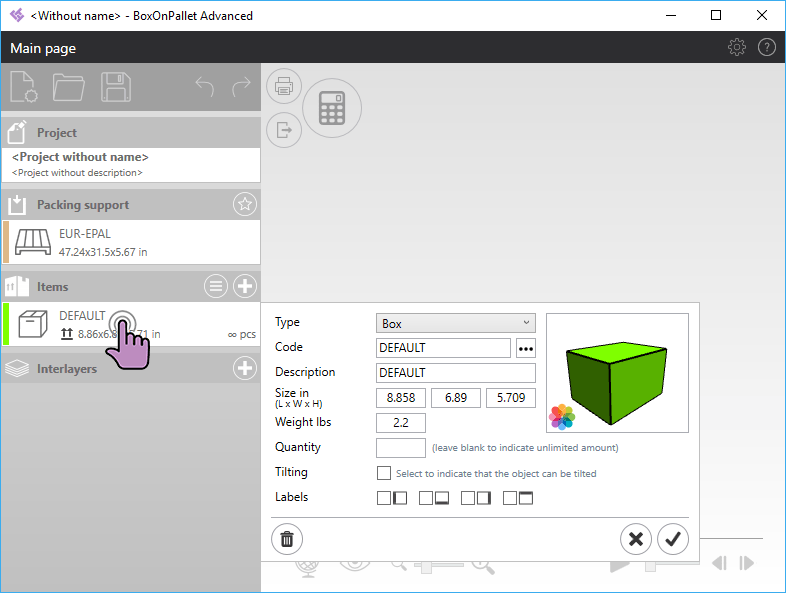
Tips
- Clck the button
 to open the list of default items for the selected object type.
 - Click on the icon
 to select the color with which to represent the object.
 - The "Quantity" field is used to indicate the number of objects that must be inserted into the solution; this number must be indicated in case of mixed solutions. On the contrary, in the case of palletizing a single type of item, it is advisable to leave the field blank.
- You can add additional elements to the list of items you want to load by clicking on the icon
 located at the top right of the "Items" section.
 - To remove an element from the list of items to be loaded, click the item you want to delete and then press the button

- To import the list of items from an external file, click on the icon
 located in the top right of the "Items" section and choose "Import from a list". The function may not be available in some versions of BoxOnPallet.
- Clck the button
-
(Optional) Adding separators between layers
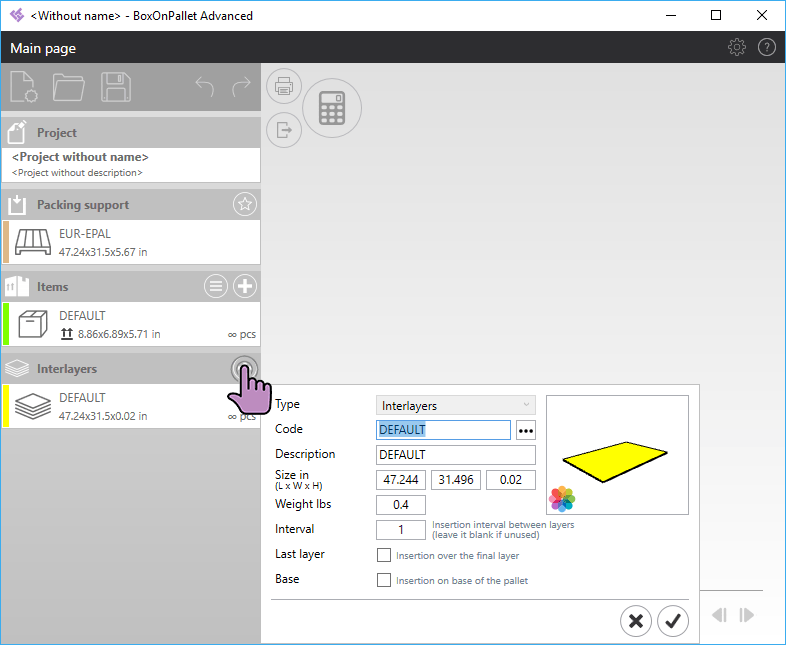
 located at the top right of the "Interlayers" section, enter the desired data and click on the "✓" button to confirm.
Tips
- Click the button
 to select the default interlayer according to the size of the pallet used.
 - Click on the icon
 to select the color with which to represent the object.
 - You can add additional separators by clicking on the icon
 located at the top right of the "Interlayers" section.
 - To remove a interlayer from the list, click the item you want to remove and then press the button

- Click the button
-
Calculating the solution
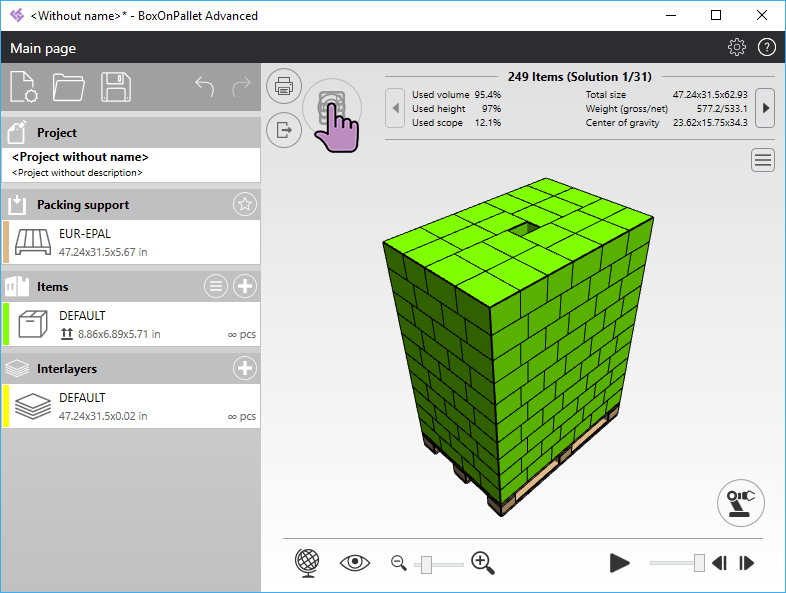
 "Calculate". BoxOnPallet will process a list of possible solutions and automatically display the best according to the volumetric efficiency criterion.
Tips
- Use the buttons
 and
and  located on the sides of the summary information to scroll through the list of proposed solutions.
 - Move the mouse pointer over the 3D representation of the solution, then move the mouse by holding down the left button to change the point of view of the graphic representation.
- Move the mouse pointer over the 3D representation of the solution, then scroll the wheel to change the magnification. Alternatively you can click on the icons
 and
and 
- Click on the icon
 to select one of the default views.
 - Click on the icon
 to restore the 3D representation to the default point of view.
 - Use the controls
 to Start/Stop the load sequence animation.
- Use the buttons
(*) The features described refer to the "Advanced" version of BoxOnPallet. See the Download section for comparison of features offered by the different versions of BoxOnPallet.
